Heads up! The screenshots in this article are from Clipchamp for personal accounts. The same principles apply to Clipchamp for work and school accounts.
On this page

Bring travel memories to life with an aesthetic highlight reel perfect for social media.
Vlog style travel videos are ideal for capturing a ‘day in the life’ abroad or recapping a trip’s adventures. Create polished travel highlight videos from your clips and photos by auto composing with the AI video editor. Then add flair with special effects, animated text, and unique voiceovers to make your content stand out in the feed.
Get inspired with some beginner-friendly travel highlight video ideas then learn how to create and edit them with Clipchamp video editor.
How to make a travel video
Step 1. Import media or select stock footage
Click on the import media button in the your media tab on the toolbar. Upload your travel and photo videos by browsing your computer files or connect to your OneDrive.

If you would like to create a highlight video using stock footage, click on the video library tab on the toolbar. Browse the royalty-free video library to select the right stock for your video. Use the search bar to look for stock based on keywords or click on the see more button within a video category.

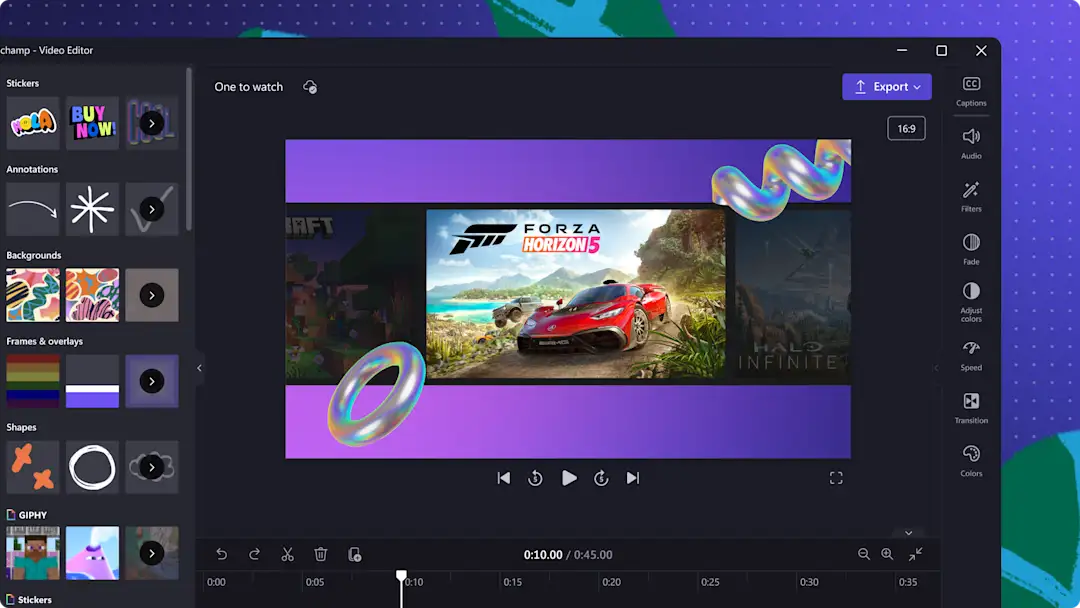
Step 2. Customize aspect ratio and add videos to timeline
Before you start editing your video clips, you'll need to change the aspect ratio from 16:9 to 9:16 to suit social media dimensions. Click on the size button in the floating toolbar then click on the vertical 9:16 option. This is the recommended aspect ratio for Instagram Reels, Stories, and YouTube Shorts.

Once you've changed the video aspect ratio, drag and drop video clips onto the timeline to start editing.

Step 3. Trim video clips, remove gaps, and add transitions
It’s now time to trim the length of your video clips so your viewers only see your favorite highlights. Click on the video on the timeline so it’s highlighted, then drag the handles to the left of the timeline with your cursor to trim the video length.

Trimming video clips will leave spaces between clips on the timeline. To remove any blank spaces or gaps, use the gap removal feature. Hover your curser over the gap in the timeline and click on the delete this gap button.

Next, create smooth changes between video clips by adding scene transitions. Click on the transitions tab on the toolbar and scroll through the scene transition options. Hover your curser over each option until you find one that suits your travel highlight video. Drag and drop the transition onto the timeline between two clips.

Step 4. Overlay text and stickers
Call out different locations and activities in your adventures by overlaying animated text. Click on the text tab on the toolbar to browse different options like plain text, titles, and subtitles. Hover your cursor over each title to preview the text style, then drag and drop the right fit for your travel video onto the timeline.
Next, click on the text tab on the property panel to change the size, font, alignment, and other settings. Here you also edit the text, or with some text styles you can enter text inside the text box on the video preview.

Add subscribe buttons, travel, scrapbook, reaction words, and sign language stickers to make your videos informative and dynamic. Click on the content library tab on the toolbar then click on the visuals drop-down arrow and search the stickers category. Drag and drop a sticker onto the timeline and edit the size and position using the floating toolbar and sticker corners.

Step 5. Add an AI voiceover and AI captions
Narrate viewers through your travel video by adding an AI voiceover. Click on the record & create tab on the toolbar, then click on the text to speech button. This will open the text to speech tab on the property panel. Here, you can enter your text and change the voice, tone, pitch, and other settings of your voiceover.

Make videos easier to understand when watching on low volume by adding AI autocaptions. Make sure no assets are selected or highlighted on the timeline, then click on the captions tab on the property panel and follow the prompts. AI will automatically generate subtitles and a downloadable video transcript.

Step 6. Preview and save travel highlight video
Once you've finished editing, preview your video by clicking on the play button above the timeline. When you're ready to save, click on the export button and select a video resolution. You can upload directly to YouTube, TikTok, or save to your computer or OneDrive.

How to make a travel video with AI video editor
Create travel highlight Reels in minutes with the AI video editor. Upload travel footage along with photos and other media like audio, then the AI video editor will generate an editable video for you. Follow these quick and easy steps to get started.
Sign in to Clipchamp then click on the create a video with AI button on the homepage.
Name your travel highlight video, upload videos, photos, and other media, then click on the get started button.
Choose a video style by using the thumbs up or thumbs down buttons on the themes that the AI video editor suggests.
Select a video aspect ratio and set the video length.
Pick from the AI-suggested background music and font (optional for some themes).
Export your highlight video to OneDrive or continue editing in Clipchamp video editor for more advanced editing tools.

Elements of an engaging travel video for social media
Clean and clear audio: you can’t always ensure audio quality when recording outside. Clean your audio whether recorded with a lapel mic or your mobile device using AI noise suppression to remove any unwanted background noise.
Informative text and titles: inform viewers on travel details and locations using animated text and motion titles. Customize the text by editing the font, color, position, and other settings to suit your video aesthetic.
Professional narration and voiceovers: capture attention on social media feeds by adding lifelike AI voiceovers or guide viewers yourself by voice recording your own narration track.
Engaging video effects: enhance beautiful and scenic video footage with color correction or excite viewers with special video effects. You can also use handy effects like blur and blur fill to protect the privacy of people in the background of your travel footage.
Soft royalty-free background music: set the mood of your travel highlights by adding soft and soothing background music. Search the royalty-free audio library by genre or keyword for thousands of high-quality free songs and sound effects.
Combine videos and photos: make travel videos dynamic by overlaying close-up images over landscape shots. Just import images from OneDrive or your device, then overlay onto any video clip. You can even use the AI image background remover to eliminate any background distractions.
Explore trending travel video examples
Day-in-the-life vlog
Take your followers along on your journey by sharing a day-in-the-life vlog. Inspire viewers through short clips of local culture, food, landmarks, and personal adventures.
Clean out any unwanted background ambient sounds from footage filmed in public using AI noise suppression. Watch this ‘day-in-the-life’ vlog example on YouTube Shorts to see this style in action.
Yearly travel recap highlights video
Share your gratitude and excitement with your friends, family, and followers in magical travel recap videos. From beautiful landscapes and plane window views to iconic food and historical buildings, create an aesthetic travel highlight video for Instagram Reels.
Film a talking head narration video clip in one take then use AI silence remover to automatically cut out any unwanted pauses. Watch this yearly travel recap video example on Instagram for a better idea of this travel video style.
‘What we spent’ vlog
Record the cost of experiences like public transport and food to create tips for other travel-curious viewers. Popular on TikTok, Instagram Reels, and YouTube Shorts, this travel highlight video style is perfect to give viewers information on what’s worth the money, and what’s not.
Combine quick snippets of footage together by merging video clips of video clips then add text overlays to emphasize all the important money tips. Watch this ‘what we spent’ vlog on YouTube Shorts as a great example.
Scenic travel highlights
Showcase moments like breathtaking starry skies and snowy mountains with highlights that focus on the views and scenery. Intensify your scenic clips by enhancing stars, lights, and glitter with the bokeh video effect.
You can pair aesthetic shots with peaceful royalty-free music, frames and borders, and elevate your video further with video filters. Get inspiration by watching this scenic travel highlights video example on YouTube Shorts.
Travelling tips
Inform your followers about helpful travel tips and tricks with a montage video. Use moving footage and still imagery by combining video clips in a range of angles like birds-eye views, selfie mode, and timelapse. Travelling tips highlights can also act as perfect YouTube channel teaser videos and trailers for your widescreen video content.
Record an AI voiceover using text to speech and share your tips without having to record your own voice. Watch this travelling tips video example on Instagram to see how it’s done.
Watch how to create a highlight video YouTube tutorial
Learn how to make travel highlight videos by following this beginner friendly how-to video.
Want to make more scroll-stopping social media videos? Learn how to make highlight Instagram Reels and explore more vlogging tips.
Create outstanding travel highlight videos for free online in Clipchamp or download the Microsoft Clipchamp Windows app.